Transcript
Hi, I’m Joe Fiorani, a Senior Tech here at Carroll Water, and today I’m going to show you how to set up your WiFi on your brand new HydroLink ERO-375.
Log In to Your Account
The very first thing you’re going to want to do is you’re going to log on to your account using your EcoWater app on your smartphone.
Set Your HydroLink to Connect Mode
Second, you’re going to want to pop the lid off of your HydroLink and you’re going to notice this little HydroLink plus in here. It gives you a couple directions on the top of it but there’s a little connect button. You can use a pen. You’re going to hold that in for a couple seconds, release it. Once it starts blinking with an amber light, it’s going to be in “connect mode”. At that point, you’ll want to get on your app and you’re going to follow directions.
Once you’re in connect mode, you can go ahead and hit “add system”. It’s going to say, “Place your device in browser connect mode,” which we’re already in, so then you’re going to want to go to settings from there.
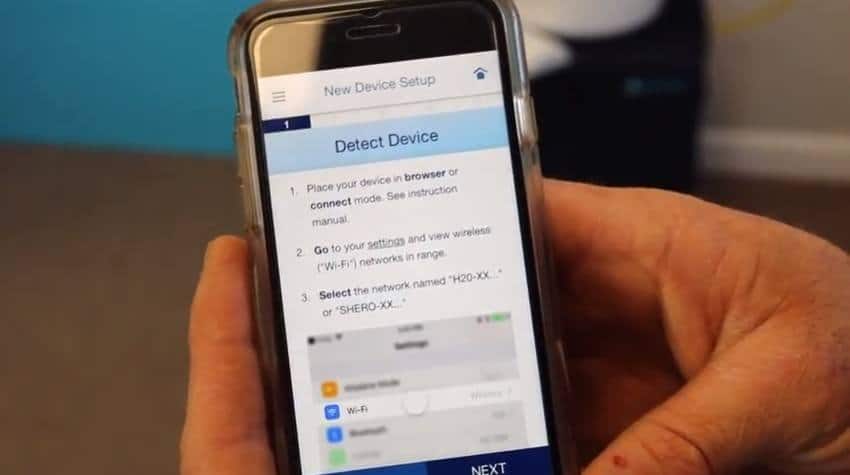
Configuring Your WiFi Settings
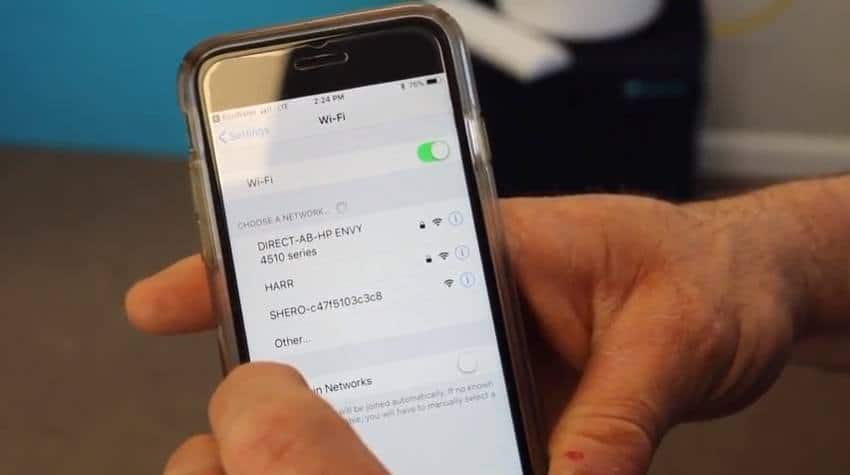
In settings, you’re going to want to go to your WiFi. You’ll notice something that says SHERO with some numbers behind it. You’re going to connect to that. It’ll redirect you. Then, it should get back into the app. Then, hit next.
It’s then going to ask you to select your local WiFi network. You’re going to need to enter your password.
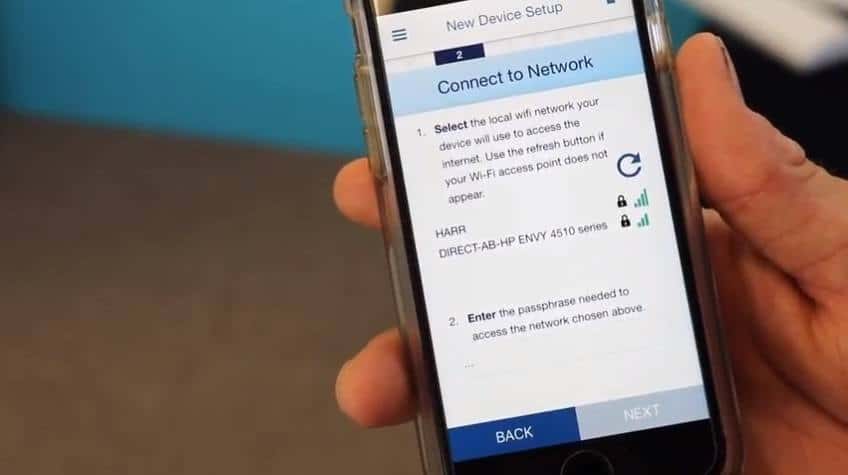
Once your unit is connected, the light on the HydroLink will actually turn green. Then it will take you to your basic systems settings.
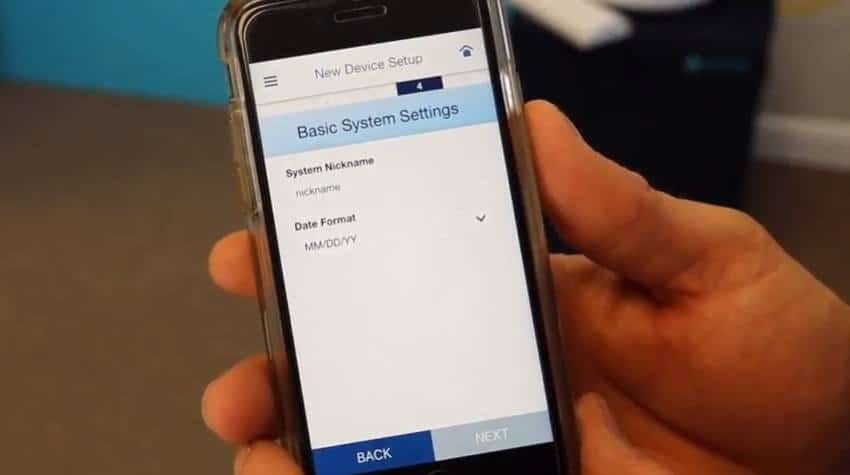
This is going to ask you for a nickname. You can nickname it what you want. The date format, month month, date date, year year is pretty common. It’s going to make you put a name in so you can just set it up as RO for reverse osmosis. Then, go ahead and hit the next button.
Configuring Your Notification Settings
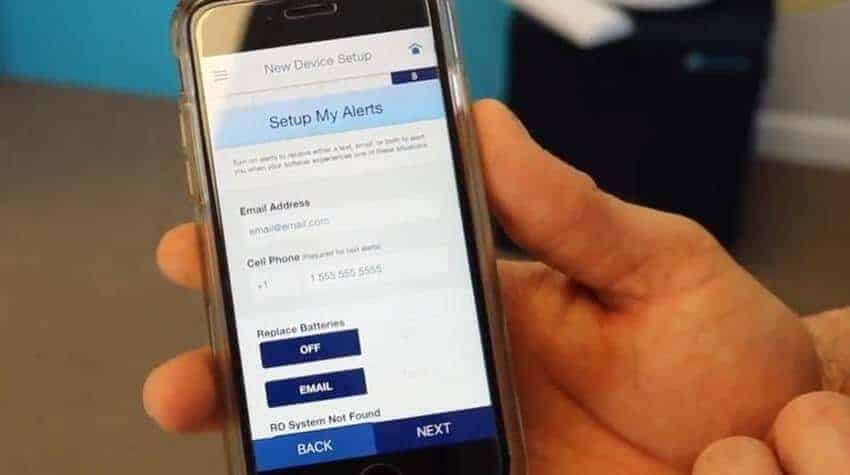
Now, you’re going to want to put your email address in and a phone number and then you can go down and type what you want as an alert.
If the batteries need replacing, you can hit “on”. Decide if you want an email sent to you or a text. RO system not found: You can say whether you want an email or text. Replace filters, which is an important one. You want to go ahead and turn that one on. Select whether you want an email or text.
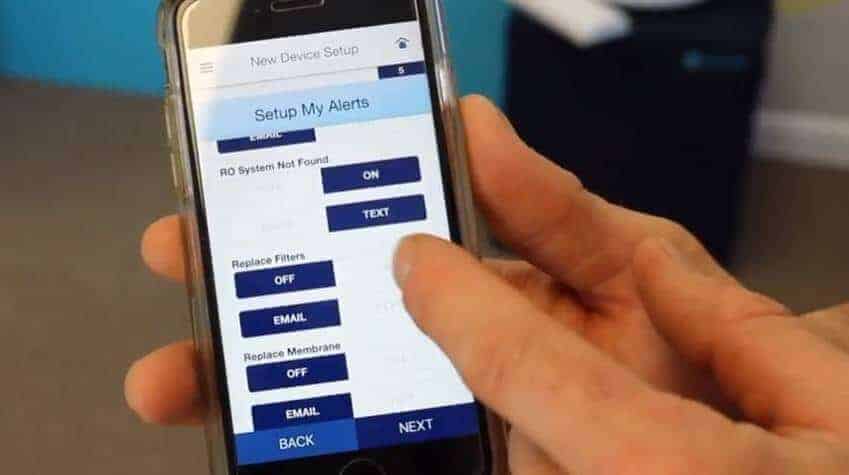
Replacing membrane, which is another important one. You want a high rejection rate so when everything is said and done, it’s going to tell you what your rejection rate is which is typically in the 90 percentile. Once it gets down to I believe 70% or 75% it’s going to send you an alert saying, “it’s time to replace your membrane”, and the system will email or text you when it’s time. Then you’re going to hit the next button.
At this point, your WiFi setup is complete. All you need to do is put the lid back on your reverse osmosis and you’re ready to go.
Questions?
If you have any questions or concerns, you can give us a call at (800) 978-5100.

